Frequently asked questions

Topics

Page loading

How do Credits work?

Each time one of your tests or surveys are taken, only 1 credit is used. For example:

  1. If you have 1 test and 5 users take it, 5 credits are used.
  2. If you have 2 tests and 5 users take them once each, 10 credits are used.
  3. If 1 user takes the same test twice, this will use 2 credits and so on.

When you buy credits you get access to all upgraded account Features:

  1. Certificate downloading
  2. Email results
  3. Save and review results
  4. Export results
  5. Analyze detailed Statistics
  6. API Integrations
  7. And more...

See our pricing options

How to Edit Test settings?

When you assign a test either by Group or Link, you will be provided with a number of customizable settings such as:

  1. test availability
  2. attempts allowed
  3. include certificates
  4. pass mark
  5. feedback messages
  6. and more...

ClassMarker gives you the flexibility to modify and reuse tests and test settings as needed:
To edit the settings for your test go to the Tests section and open the row for your test and select 'Settings' next to the group or link you wish to edit.

How to use Random Questions?

You can enhance security and variety in your tests by randomly pulling questions from categories in your question bank.

With ClassMarker you can create tests with:

  • Fixed questions: Consistent questions every time.
  • Randomly-selected questions: A different set of questions is displayed every time.
  • A combination of fixed (consistent) and randomly-selected questions (varying every time).

Tip: Combine random and fixed questions to give users consistent content with a fresh mix of questions each time they take a quiz. Add further customization by creating Question Bank categories with different levels of difficulty.

Learn more

Can I add multiple administrators?

Yes, ClassMarker's Assistant feature lets you assign multiple administrator roles with different access permissions. Permissions include:

Managing test results: View, grade, delete results. Reopen finished Tests
Managing Users: Group members, access lists.
Managing content: Questions, categories, themes, certificates, files, Webhooks, API keys, account payments.

By delegating specific tasks to different Assistants, you can streamline your workflow and reduce the workload on any single individual.

See: How to Create Assistants

Can I hand over my account to someone else?

For the main administrator account:

  1. Go to the "My account" page.
  2. Under "My details," update the username, password, name, and email.
  3. Provide the new details to the new administrator.

For assistant accounts:

  1. Only the main administrator can update an assistant’s username, email, and permissions.
  2. Assistants can change their own password under "My details" on their "My account" page.

Learn More

How to duplicate tests?

ClassMarker's allows you to duplicate Tests, questions, certificates, and assignment settings. Duplicate tests to make slight variations without affecting the original or to assign with different settings.

Duplicate a quiz:

  • To save time by reusing existing questions instead of creating from scratch.
  • For consistency: To ensure the core content remains the same while making necessary updates.
  • To tailor quizzes for different audiences or purposes.
  • To track and compare results by creating yearly or periodic versions of the same quiz.

Learn More

Can I create tests in multiple languages?

Yes, ClassMarker's has been built to accommodate the testing needs of all our users. That's why we offer a multilingual student & Test taker interface with language options.

English is our default Interface language but you can create your Tests in 25 supported languages.

Review our: Language options

What results can I see?

You can easily view Test takers, Names and emails, Score, percentage, Question statistics and each answer given.

You can also review recent results that are still in progress in real time.

Review our: Viewing results

Can I create custom certificates?

Yes you can create customer certificates for Test takers to download in real time with their Name, test name, Score and other details you optionally require.

You can also choose to only give Certificates if a User passes their exam.

Review our: Custom certificates

On this page:

Adding Members to Groups

Registered users have their own username/password and will log in via the ClassMarker.com homepage where they can access Tests or surveys you have assigned to their Group

You have multiple options for adding members to your Groups:

Register New Members

Transfer Existing Members between Groups
Edit Single Members Details

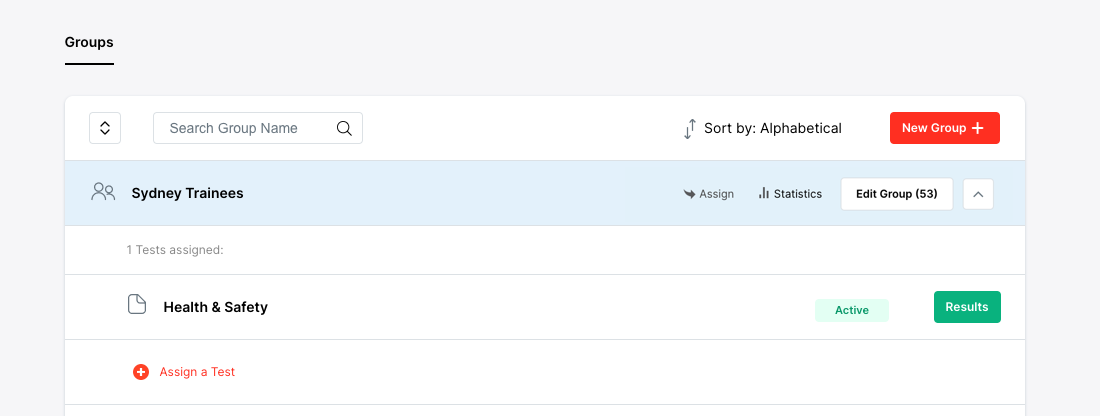
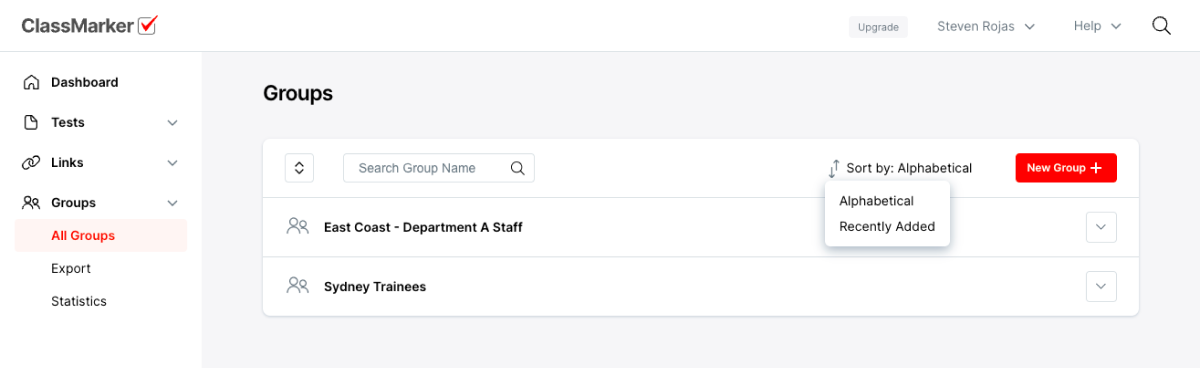
  1. Go to your Groups page.
    Screenshot
  2. Select the row for the Group to expand it and select 'Edit Group'.
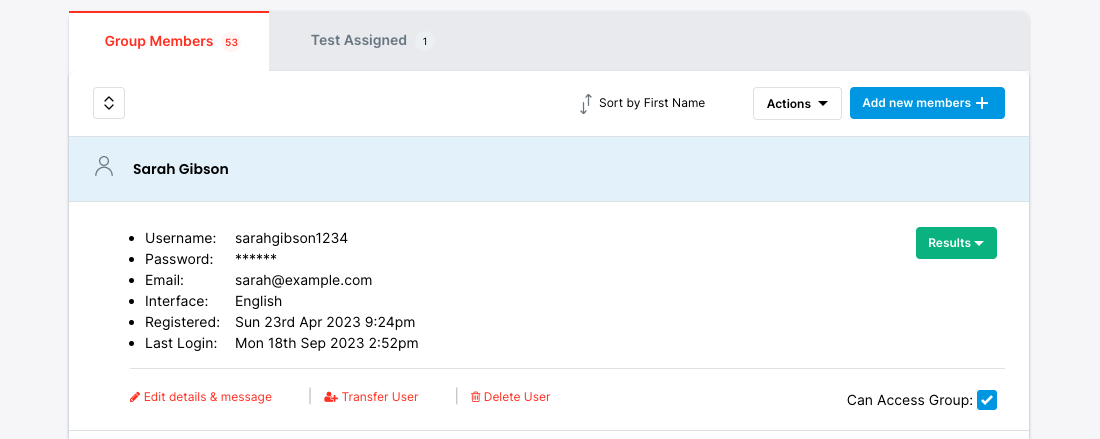
    Screenshot
  3. Now: Select the User's row to expand it and select the 'Edit details & message' link.
  4. You can now edit and save the members name, email, password and the language their interface will be in when they log in. You can also add a private message you would like them to see when they log in.

Reset All Group Members Language & Group Access

You can easily reset all Group member settings at once:

  1. Go to your Groups page.
    Screenshot
  2. Select the row for the Group to expand it and select 'Edit Group'.
    Screenshot
  3. Select 'Member Settings'.
    Screenshot
  4. Follow the instruction under your selected action.

Manage Group Members Passwords & Notify All Members

You can easily reset all Group member passwords and emails all members at once:
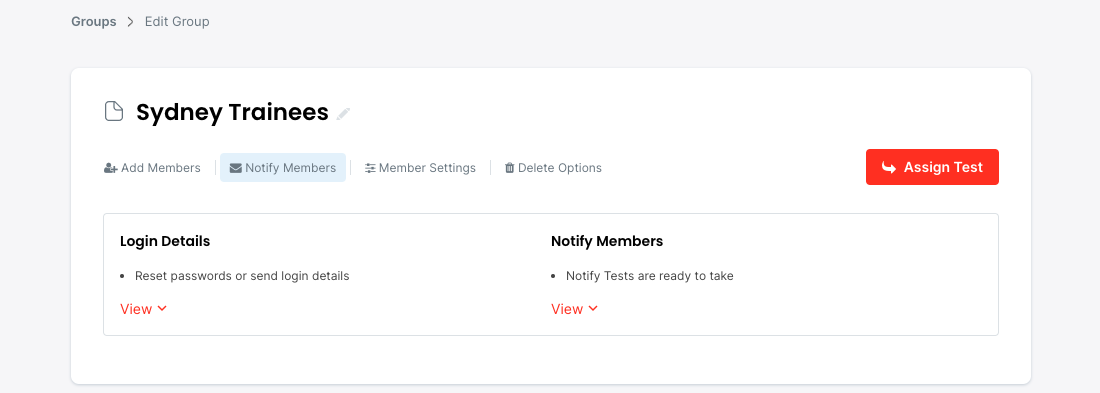
  1. Go to your Groups page.
    Screenshot
  2. Select the row for the Group to expand it and select 'Edit Group'.
    Screenshot
  3. Select 'Member Settings'.
    Screenshot
  4. Follow the instructions under your selected action.

When resetting Group member passwords, you can select to choose a common password for all Group members, or have a Reset password link sent out to each Group member to reset their password with.

Add Group Message for all Members

You can add notes for all members of a registered group to see when they are logged in.

  1. Go to your Groups page.
  2. Select 'Add Message'.
  3. Follow the instructions under your selected action.
  4. All Group members will see this message each time they log in until you update or remove the message.

Add Private Message for a single Member

You can add Private Messages for single Members.

  1. Go to your Groups page.
  2. Expend the Members row and select 'Edit details & message'
  3. Follow the instruction under your selected action.
  4. The single member will see their private message each time they log in until you update or remove the message.

Export All Members Details

  1. Go to your Groups page.
    Screenshot
  2. Select the row for the Group to expand it and select 'Edit Group'.
    Screenshot
  3. On the top right of the Members table, select 'Export' link.
    Screenshot

Export file includes:

Make a Member Inactive for a Group

You can make a Group member inactive for one of more Groups. This means the member won't see or access the groups they are inactive in when they log in. This is an effective way to prevent a Member from taking an exam or survey during their available timeframe.
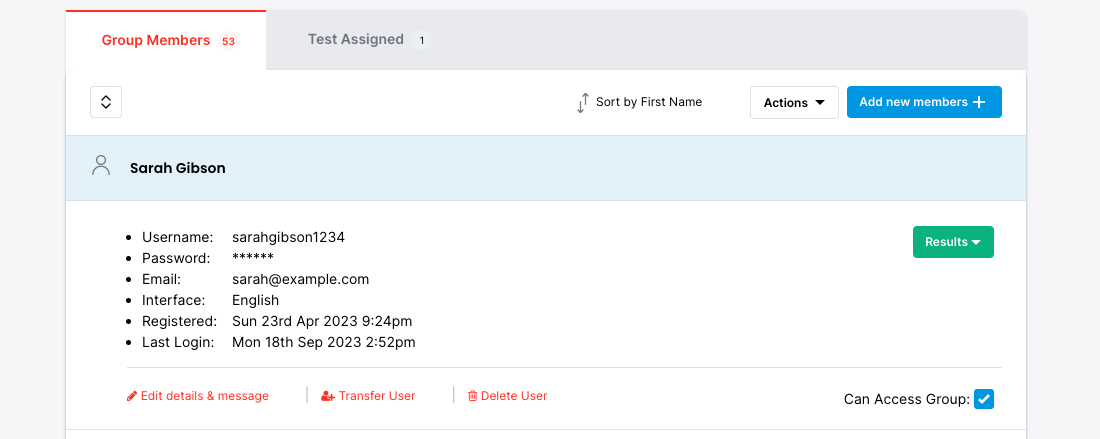
  1. Go to your Groups page.
    Screenshot
  2. Select the row for the Group to expand it and select 'Edit Group'.
    Screenshot
  3. Select the User's row to expand it and uncheck the checkbox on the right, which reads 'Can Access Group'.
    Screenshot

This user can now not access that Group when they next log in.

Re-check the check box when you are ready to allow access again.

Make all Members Inactive for a Group

You can make all Group member inactive in a Group. This means when those Member logs in, they will not be able to see or access the Group/s they are inactive for. This is an effective way to disallow all Members from accessing a Group.
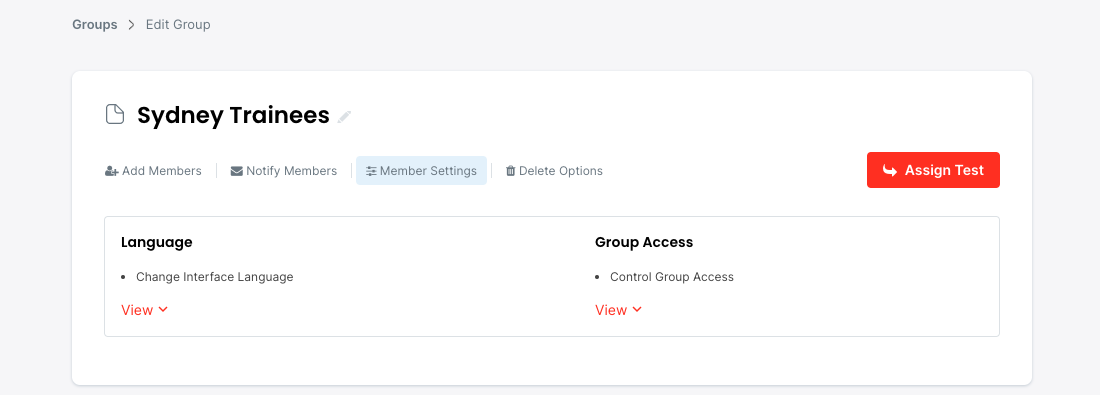
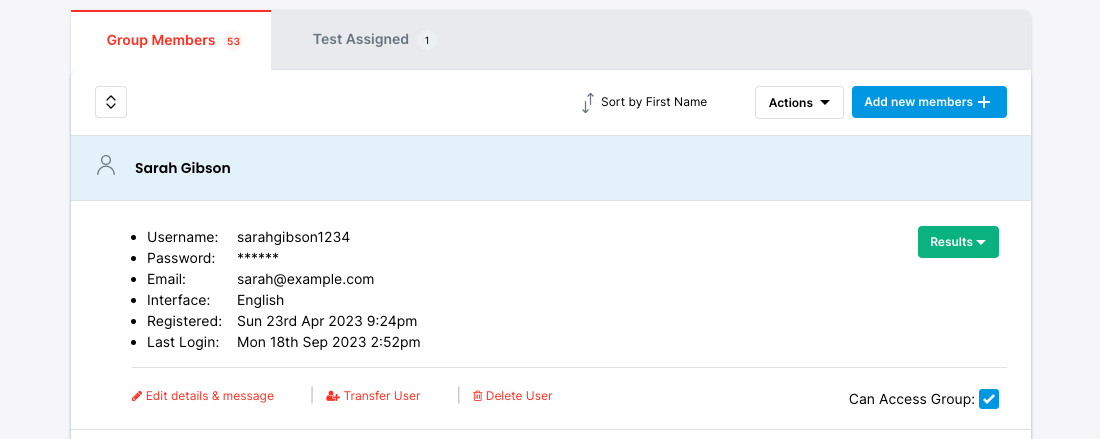
  1. Go to your Groups page.
    Screenshot
  2. Select the row for the Group to expand it and select 'Edit Group'.
    Screenshot
  3. Select the 'Group Access' link and select to make all member inactive or active in the group.
    Screenshot

Deleting Single Members

  1. Go to your Groups page.
    Screenshot
  2. Select the row for the Group to expand it and select 'Edit Group'.
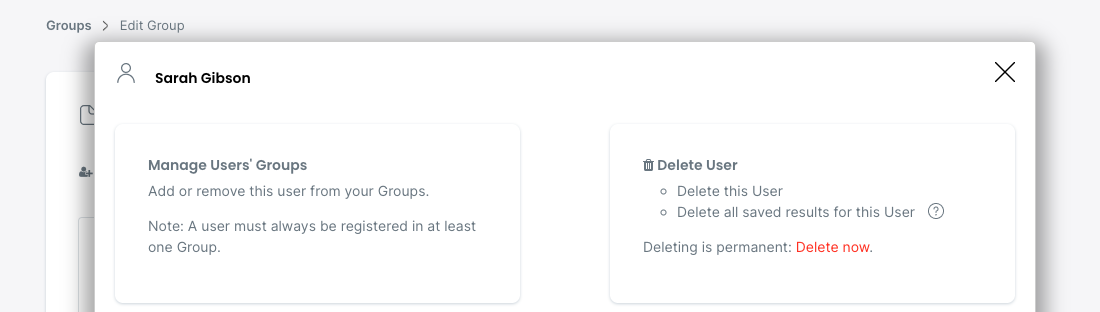
    Screenshot
  3. Select the User's row to expand it and select the 'Delete User' link and follow the instructions on the next page.
    Screenshot
    Screenshot

Note: Deleting is permanent and all the results for the Member will be deleted as well! We recommend exporting results to keep an offline copy first.
Deleting All Group Members

  1. Go to your Groups page.
    Screenshot
  2. Select the row for the Group to expand it and select 'Edit Group'.
    Screenshot
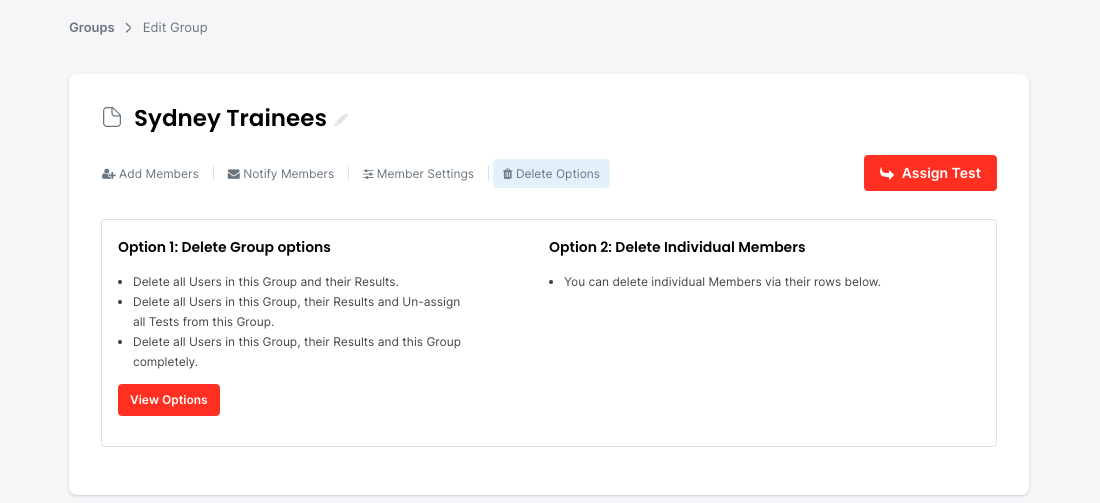
  3. Select 'Delete options' from the Toolbar in the Member page.
    Screenshot
  4. Follow the instructions for the various delete options available.
  5. Note: Deleting is permanent and all the results in that Group for all Group Members will be deleted!

Delete a Group

  1. Go to your Groups page.
    Screenshot
  2. Select the row for the Group to expand it and select 'Edit Group'.
    Screenshot
  3. Select 'Delete options' from the Toolbar in the Member page.
    Screenshot
  4. Follow the instructions to delete all Group members, their results and the Group itself.
  5. Note: Deleting is permanent and all the results in that Group for all Group Members will be deleted!
    If a Group member is registered to multiple Groups, they will not be deleted and they can still access their other Groups.
ClassMarker is Award winning 2017
ClassMarker is Award winning 2014
ClassMarker is Award winning 2011
ClassMarker Security
Forgot password? / Register now