ClassMarker system at a glance

Download Icon Download the ClassMarker Essentials Guide

Create online test
Create a Test
Close
How to Create and online test

Create a test

  • Add new questions or reuse from your Question Bank
  • Categories your tests and questions
  • Randomize question order in tests
  • All Questions are stored in your Question Bank
  • Question updates are applied across all tests
Learn how
Arrow
Online Exam Settings
Apply Test Settings
Close
Online Exam Settings

Apply Test Settings

  • Pass mark
  • Restrictions / Attempts
  • Time limits
  • Availability
  • Display random questions
  • Require user info and or ID
  • Award certificates
See more options
Arrow
Create groups to register users in
Assign to groups of
registered users
Close
Create Groups to register users in

Create groups of registered users

  • Pre-register users
  • or allow them to set their own username and password
  • Group members can access exams assigned to their group
Learn how
Arrow
How to create online tests
Test is taken
Close
How to create online tests

Test takers can:

  • See time left
  • Bookmark questions
  • Get instant feedback
  • Get scores in real-time
Arrow
Create custom certificates
Design custom certificates
Close
Create custom certificates

Give custom certificates

  • Choose from multiple styles and formats
  • Drag-and-drop text and images
  • Dynamically include scores and user data
  • Add your signature
Learn how
View exam results instantly
Get instant test results
Close
View exam results instantly

Get instant test results

  • By Test, group, link, question category, or user
  • Analyze scores and Test trends
  • Export results via CSV
  • Share results via email
Learn more
Page loading

Automated Camera Proctoring

Automated webcam Proctoring

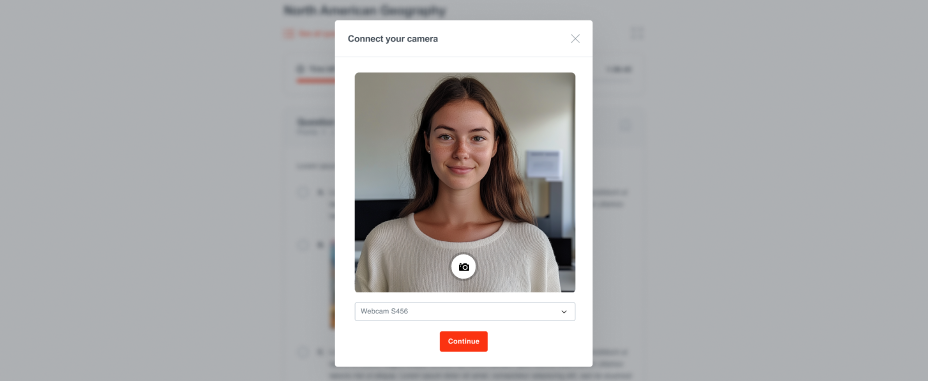
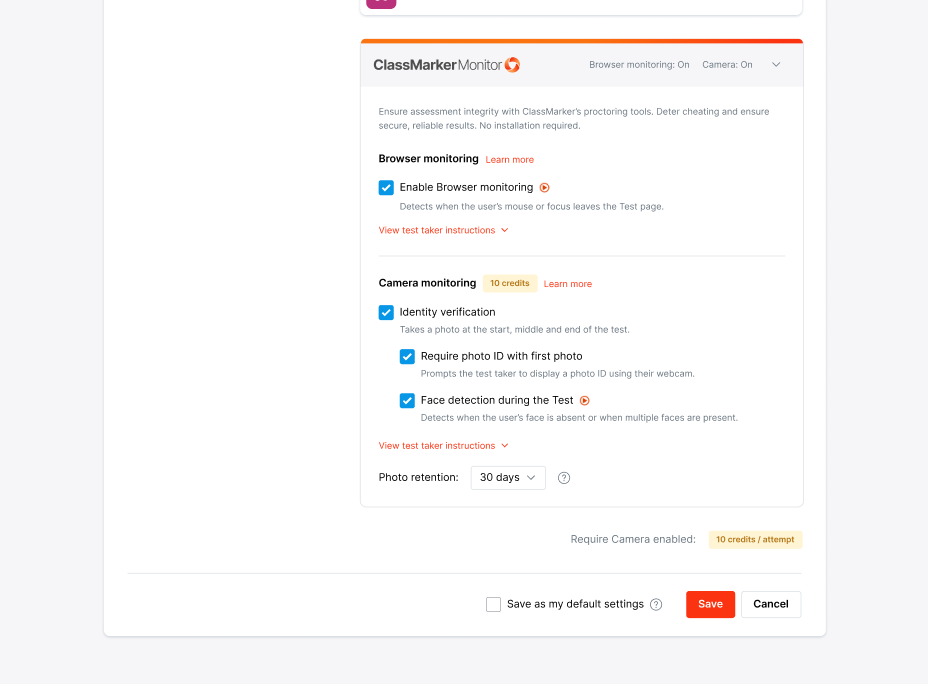
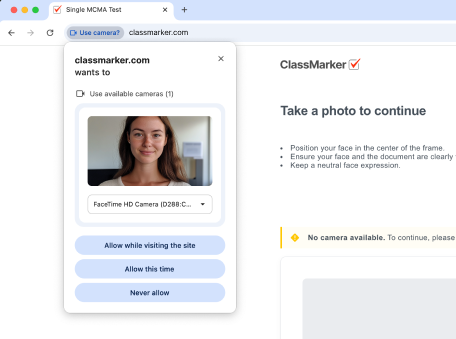
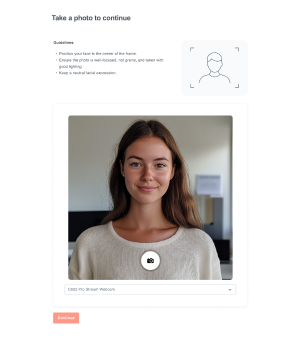
Camera Monitoring is a group of features that allows you to verify the participant’s identity and confirm their presence throughout the entire session.

The process is fully automated—no live proctor is involved. Camera Monitoring does not record continuous video; instead, it takes random snapshots during the test.

Note: Camera Monitoring uses 10 credits per test attempt instead of the usual 1 Credit per test attempt.

On this page:

Requirements

How to enable Camera monitoring features

  1. Create a Test
  2. Assign your Test
  3. Scroll to the bottom of the test settings page to find ClassMarker Monitor
  4. Select the Camera monitoring features you need
  5. Save your changes

Automated Camera Proctoring Settings

Identity verification

Photos will be taken before, during, and after the test to verify the test taker’s identity.

Require Photo ID

The Test taker will be requested to show a Photo ID when taking the first photo.
Note: Request Photo ID is not a file upload feature but a simple request to the user to take a photo with their ID document.

Face detection during the Test

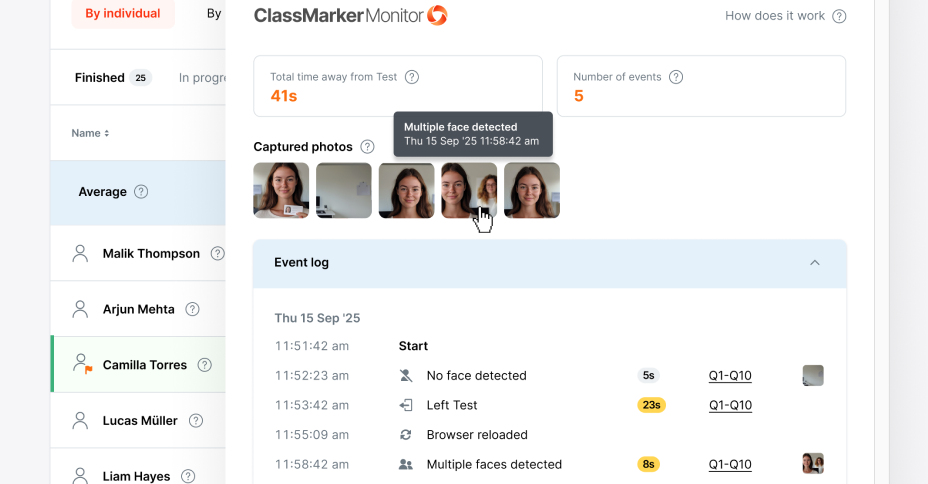
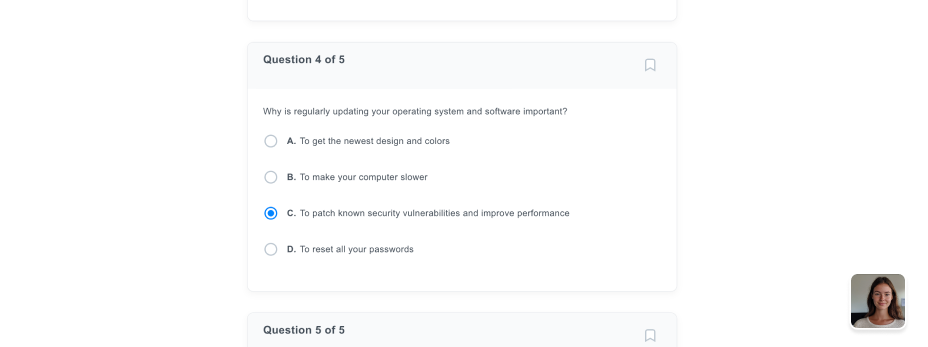
Our AI-powered face detection feature ensures that the test taker remains in front of the screen at all times, helping to confirm their presence throughout the entire session. If the test taker leaves the screen or if multiple faces are detected, the system alerts the user and logs the event in the results for the administrator.

What is tracked and logged:

How it works during the Test

Before the Test starts:

Camera Monitor Test permissions
CameraMonitor Test instructions

During the Test:

  1. The user sees a video thumbnail
  2. A photo is taken randomly during the test
  3. When Face Detection is enabled: the user’s face must remain visible at all times. If the face disappears or if a second face appears, the user is warned and the event is logged for the administrator

Automated Camera Proctoring During the test

After the Test:
A final photo is taken when the user finishes the test.

How to view Camera Monitoring data

  1. Find your Test
  2. Click on Results for the corresponding Link or Group

If Face Detection is enabled, an orange flag Flag icon 
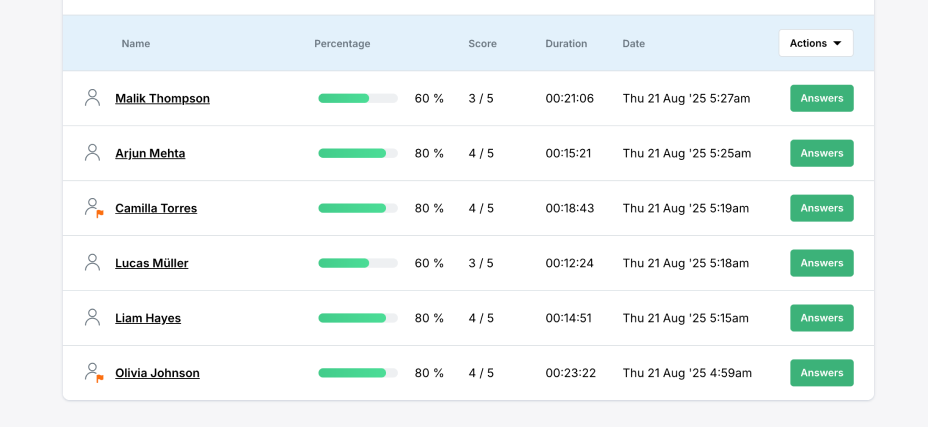
appears next to users who triggered too many events.

Proctoring Results overview

Click on the Answers button to see individual monitoring data under ClassMarker Monitor.

Proctoring Results

How does the flagging system work?

ClassMarker strives to ensure fairness for all test takers. Our algorithm includes a built-in margin of error that allows up to 5 seconds away from the test and a maximum of two ‘left’ events. This provides some flexibility for minor mistakes early on.

Here is the scale we use:

No events
No flagged events icon No flag
2 events or less
Less than 5 seconds away
0 camera events
No flagged events icon Within margin of error
No flag but events are
visible in results
3 events or more
5 seconds away or more
1 camera event or more
Flagged events icon Flag

Other settings

Photo retention
For privacy and security reasons, all photos are automatically deleted after a specified period of time.

Forgot password? / Register free